


We can send data to webhooks using the HTTP Request (GET, POST, and PUT) method.
Here, we will be pushing the data every time a user gets logged in. For this, we will create the automation with QuillCRM Automations.
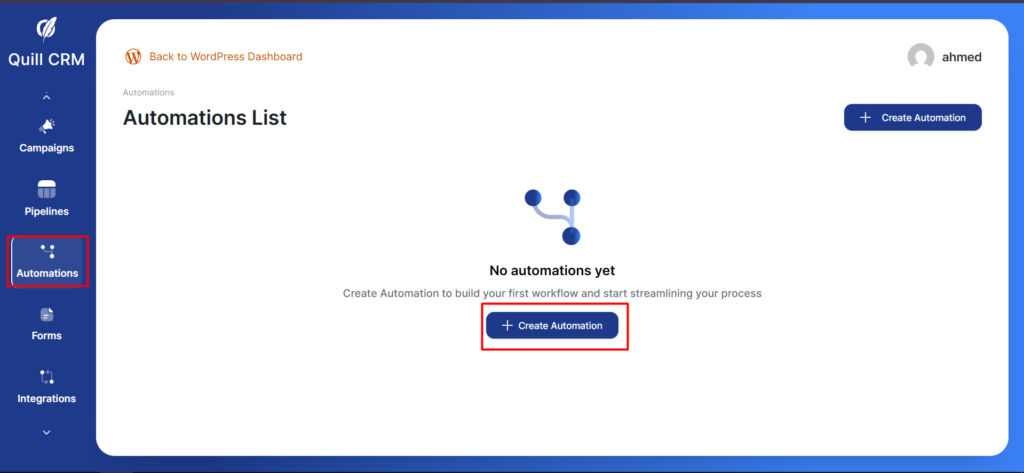
Step 1: Create an automation
Go to Automations and click on Create Automation.
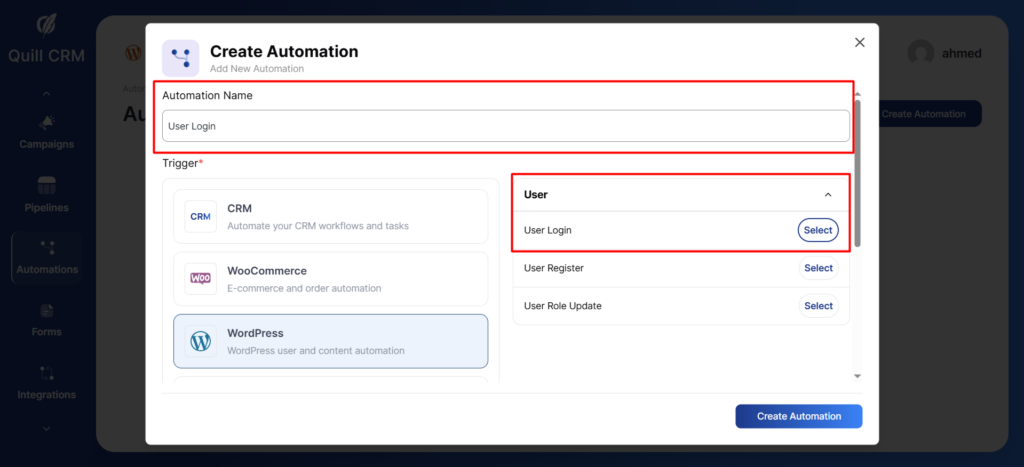
Step 2: Select an event—WordPress user login
Click on the User Login event under WordPress.
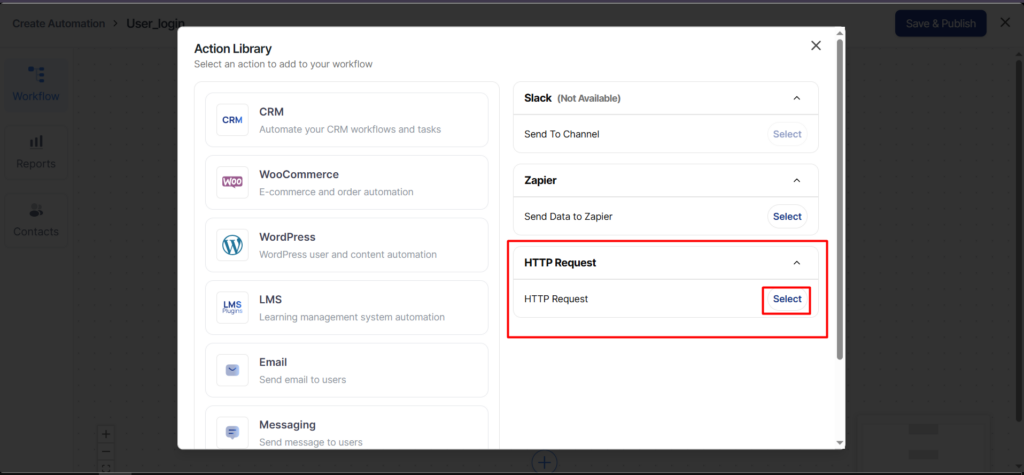
Step 3: Set an action – HTTP request under “Send data”
Choose HTTP Request as your direct action to follow up after the event is triggered.
Step 4: Paste the webhook URL
Choose your method among GET, POST, and PUT. If you’re not sure, the default option is POST.
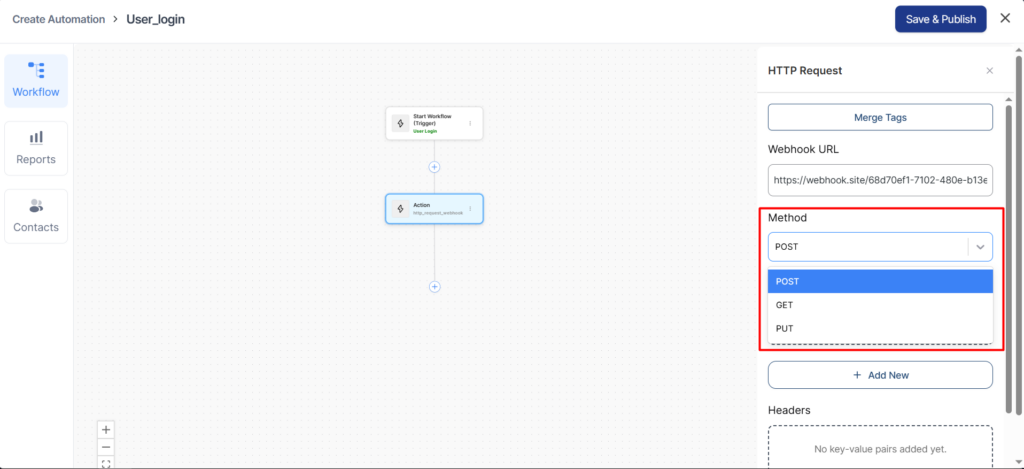
Now, enter your webhook URL.

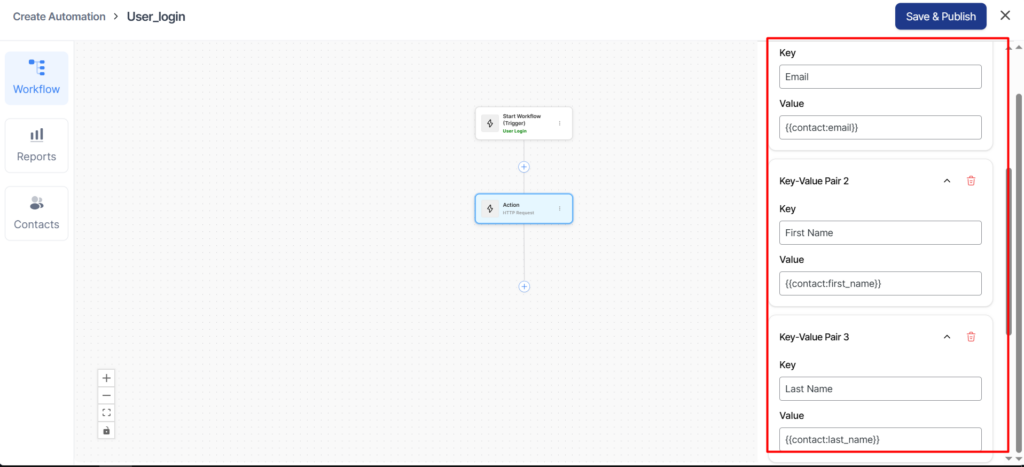
Step 5: Select the data you want to send using the merge tags
Click on Merge tags and select the field you want.
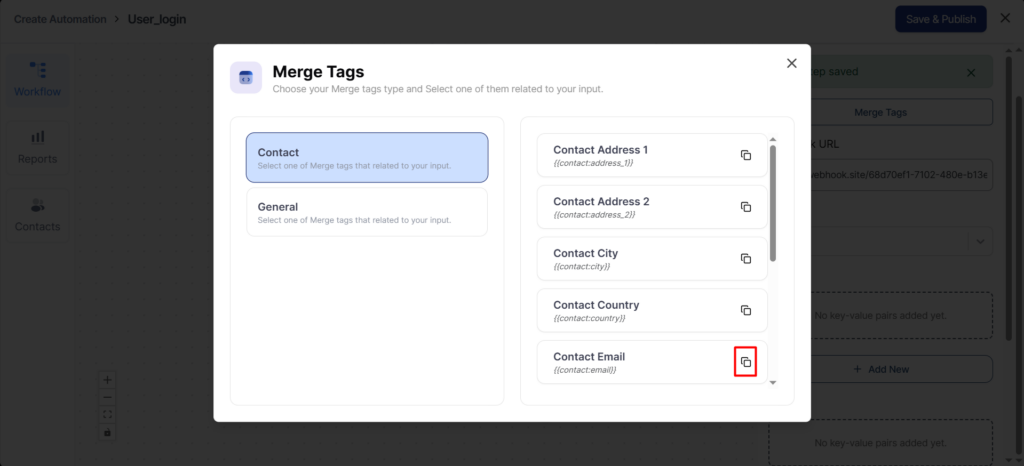
Now, paste the copied merge tag under Data.
Do the same thing for other fields you want. Here, we’ve selected the email, first name, and last name.
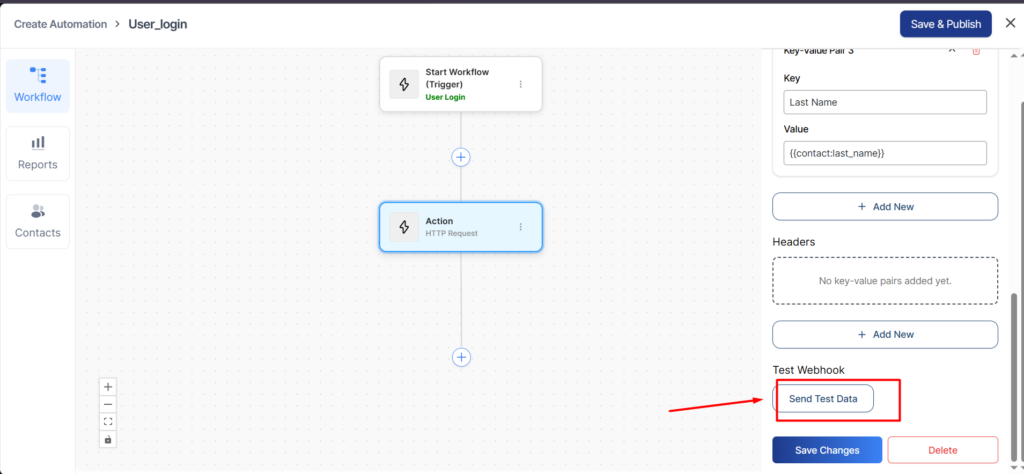
Step 6: Send the data
Once you’ve entered your webhook URL, click on Send Now.
This is how you can send data using the HTTP POST method.
Webhook Testing
If you want to test your send data request is configured properly, you can go to Webhook.site.
Click on Copy to clipboard next to your unique URL.
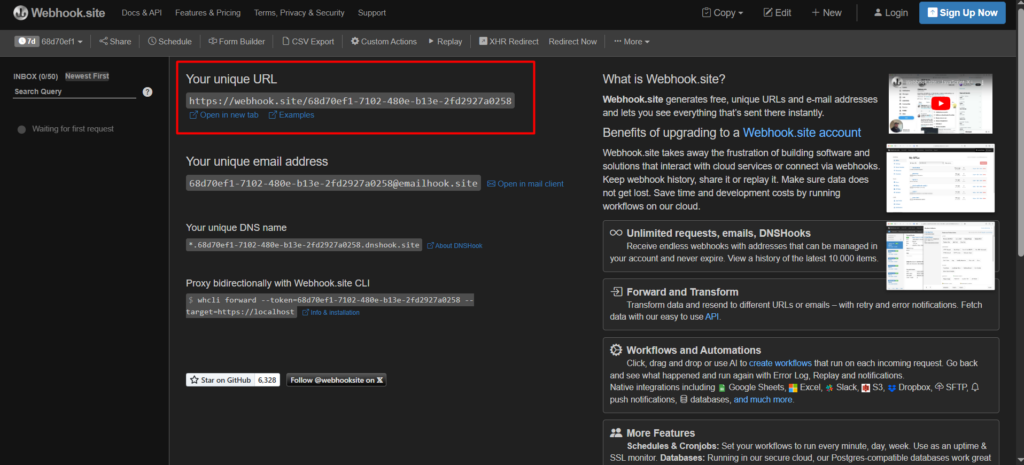
Paste this URL to the webhook URL in your automation.
Now, click on make login in WordPress.
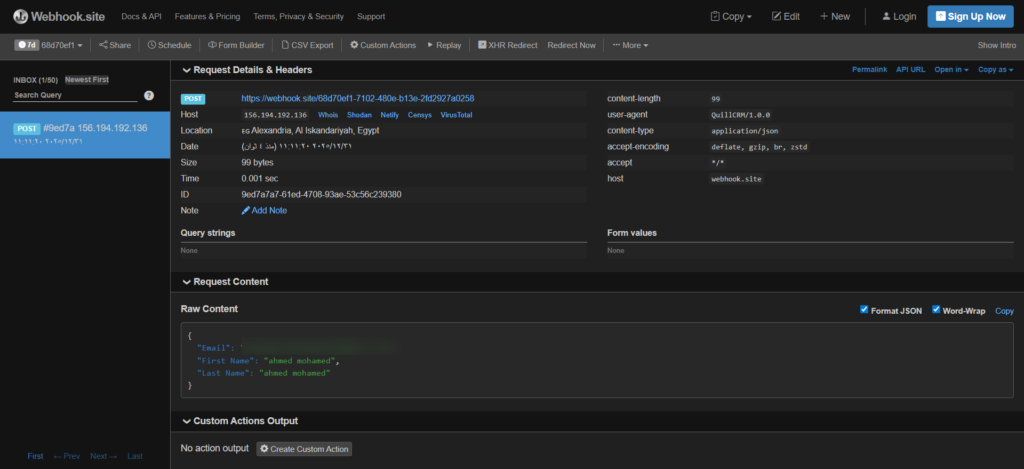
You’ll see that your data has been received on the webhook.site.
For entering the webhook URL and receiving data, you can read our Incoming Webhook documentation.