


MetForm Forms is a modern and lightweight WordPress form builder plugin designed to work seamlessly with Elementor. It allows you to create responsive and customizable forms—such as contact forms, lead generation forms, surveys, and registration forms—using an intuitive drag-and-drop interface.
QuillCRM Automations integrates smoothly with MetForm Forms. To get started, ensure that both Elementor and the MetForm plugin are installed and activated on your WordPress site.
Let’s consider a simple scenario: a visitor submits a MetForm form and selects a specific option within that form. Based on their selection, an automation workflow is triggered.
For example, if the visitor selects “Yes” for the question “Are you interested in QuillCRM Automations?”, an automated follow-up email will be sent to provide them with more information about QuillCRM Automations.
Now, let’s learn how to build this automation using MetForm Forms.
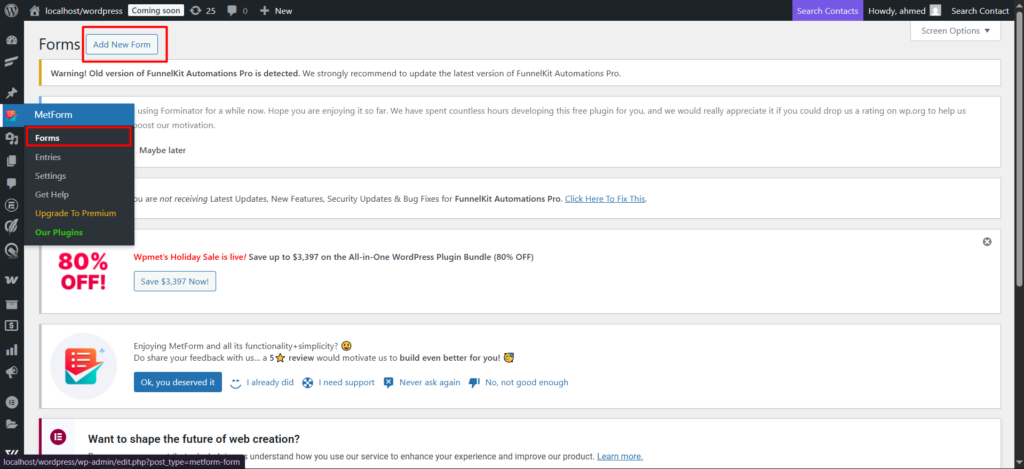
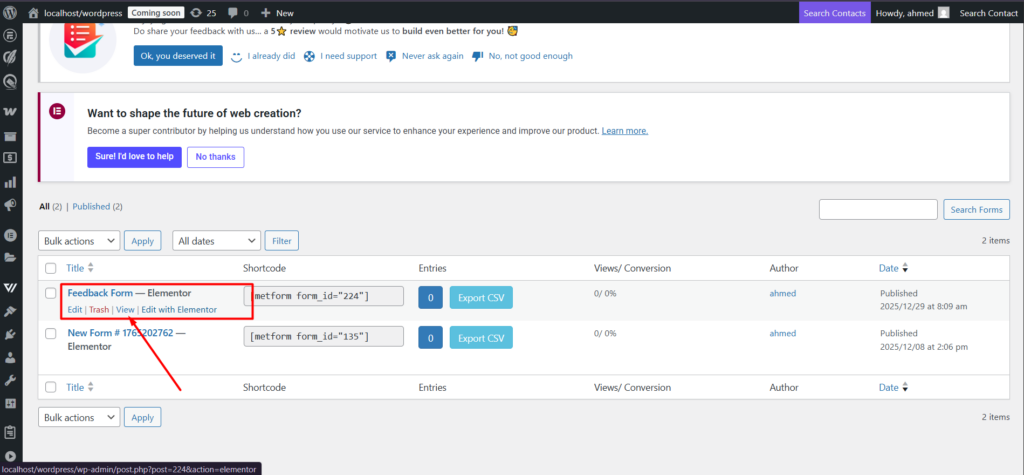
Step 1: Create a new form using MetForm Forms
Under MetForm Forms, click on New Form.
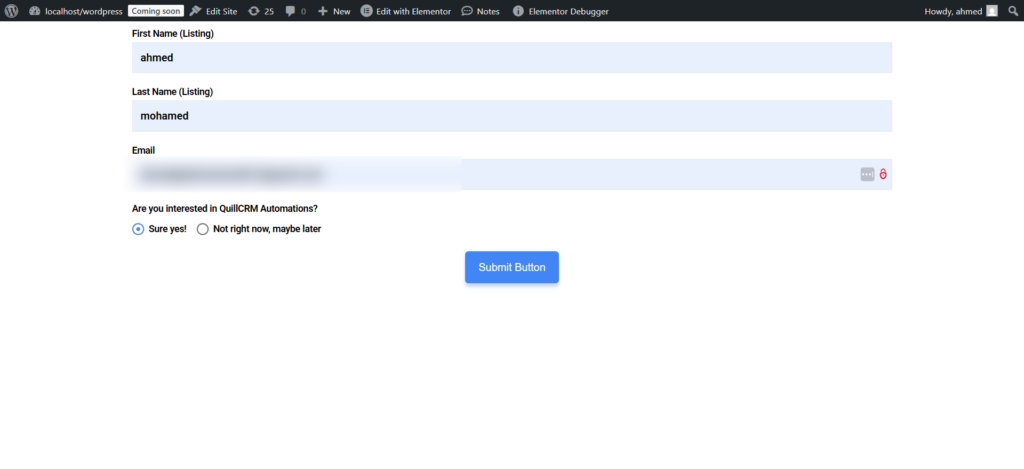
Create your form using the drag and drop feature provided by Elementor Forms.
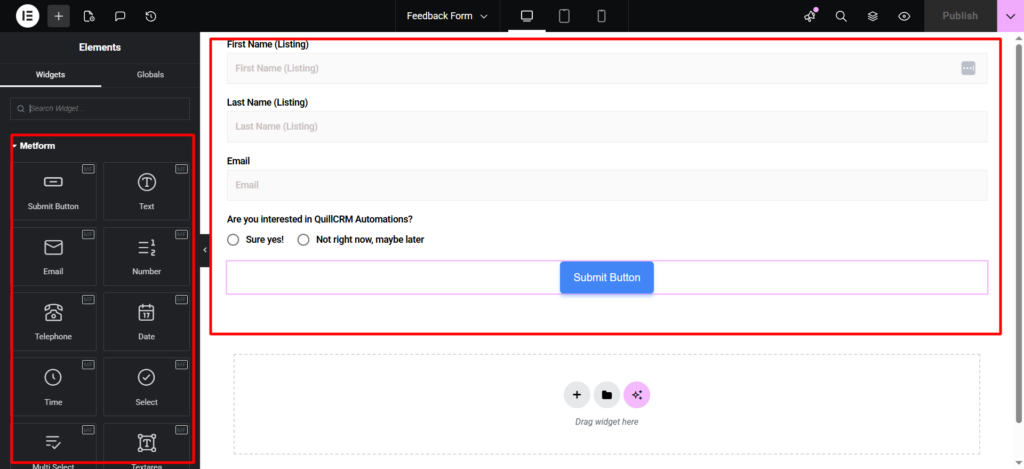
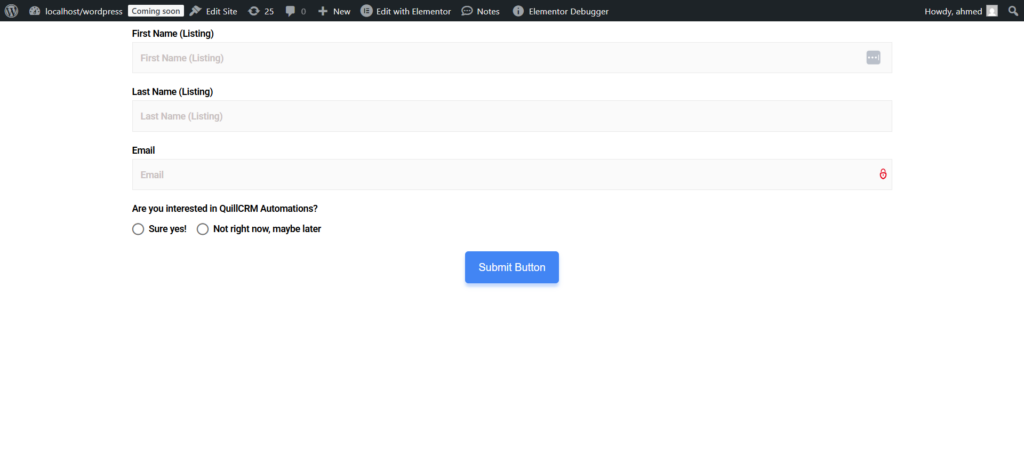
This is the structure of the form.
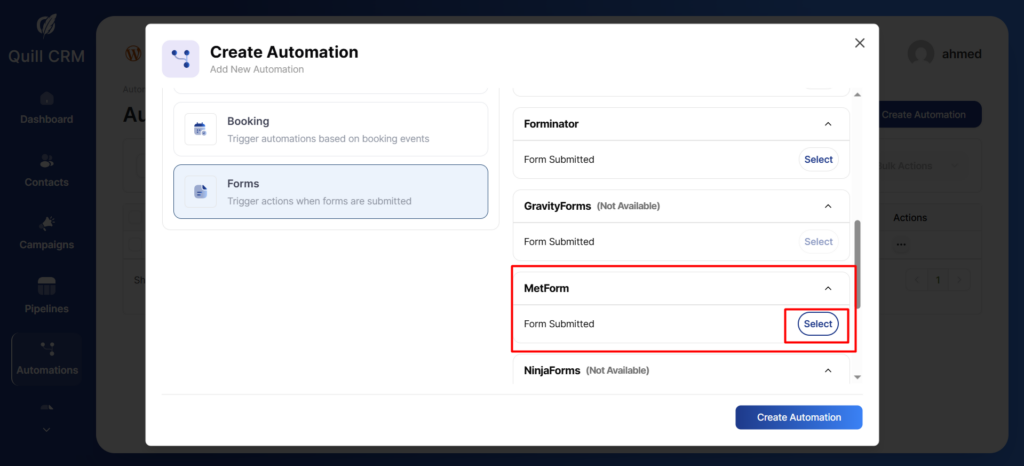
Step 2: Create a new automation and add the ‘Form Submitted’ event.
After that, go to the Automation tab and select the MetForm Forms trigger.
You will see the automation workflow. Click on the trigger to set the trigger settings.
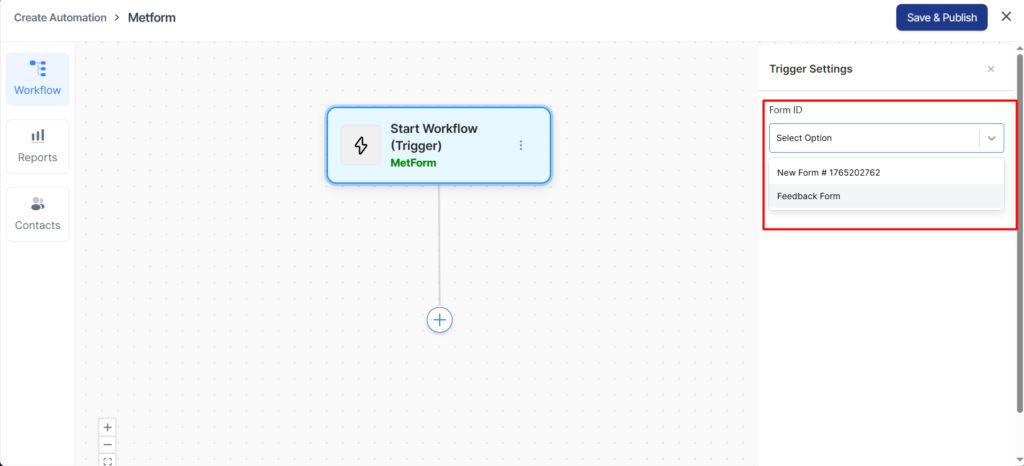
After selecting the form type, choose the form you created in MetForm Forms from the Form ID dropdown menu.
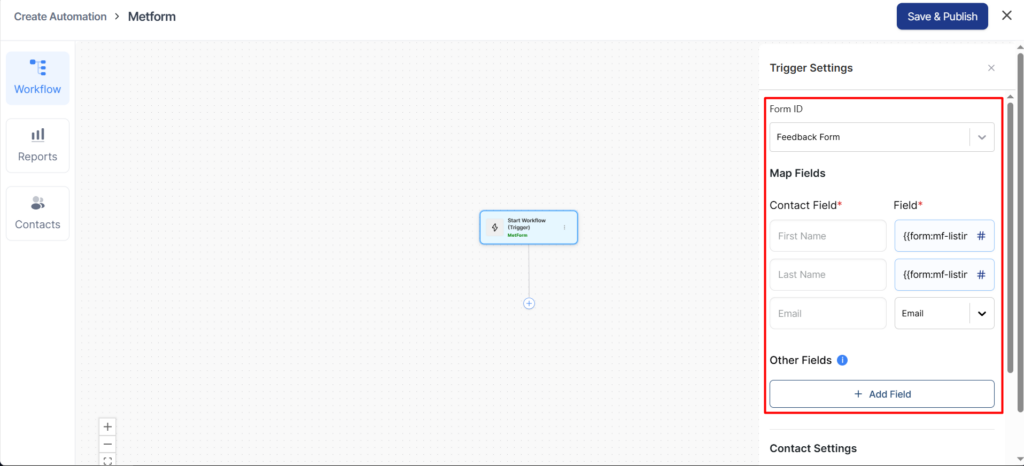
Contact Field Mapping
Map the following required fields:
- First Name—Maps to contact’s first name
- Last Name—Maps to contact’s last name
- Email – Maps to contact’s email address (required)
For each field, you can either:
- Enter a static value
- Use merge tags by clicking the # icon
- Select from dropdown options
Email Field Options
For the Email field, select the appropriate mapping from the dropdown:
- Email Address – Standard email field
Other Fields
You can add additional custom fields by:
- Click + Add Field button
- Select the Field Label from the dropdown
- Enter the Field Value or select a field/custom value
- Use the # icon for merge tags
- Click the trash icon to remove a field
Contact Settings
Configure how contacts are handled:
Lists
- Select which list(s) new contacts should be added to
- Choose from your existing contact lists
Tags
- Assign tags to contacts submitted through this form
- Helps with segmentation and automation
Update Options
Toggle these settings as needed:
- Update existing contact—Updates contact information if email already exists
- Update blank fields—only fills in empty fields on existing contacts
- Mark as Subscribed – Automatically subscribes contacts to your email list
Conditions
There is one condition that you get with your form submission event: Form Field.
Hit the Add New Condition button and click on the form builder when setting up conditions.
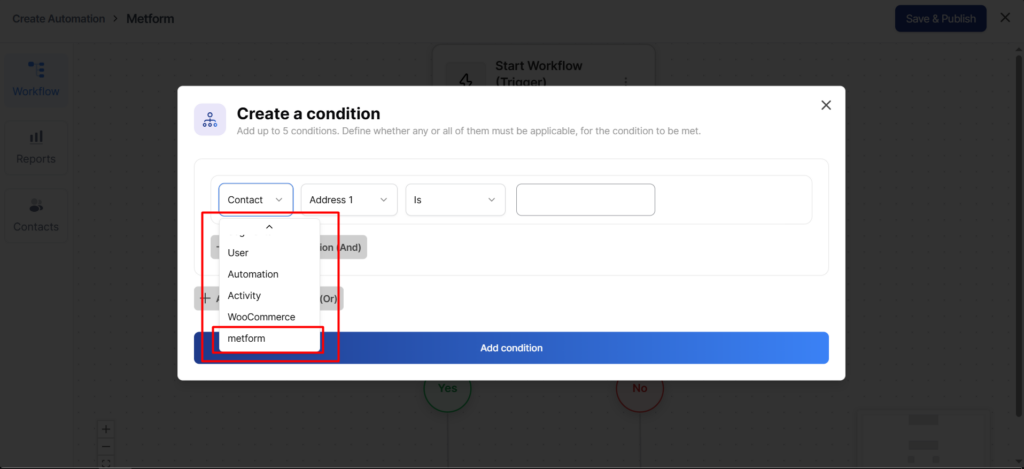
Select the ‘Form Field’ (MetForm Forms) rule under the ‘IF’ section.
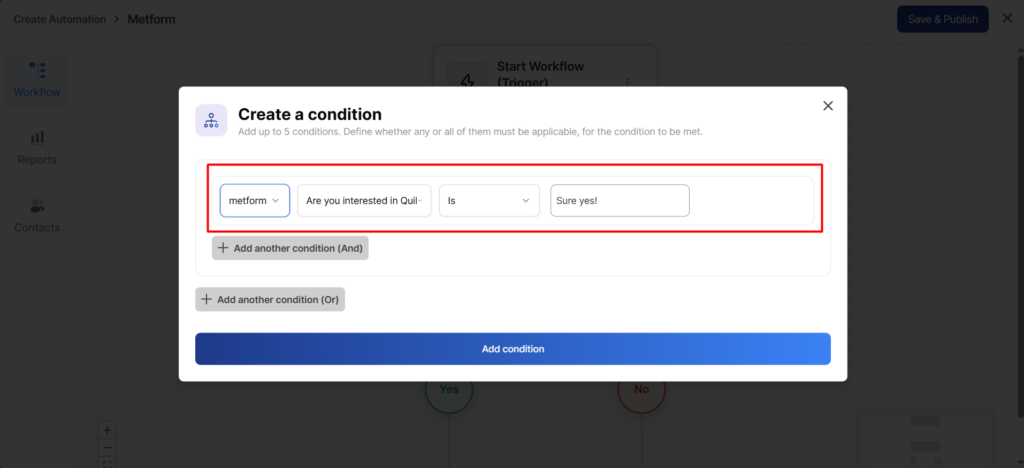
Here, we have selected the “Are you interested in trying out QuillCRM Automations?” field.
like this.
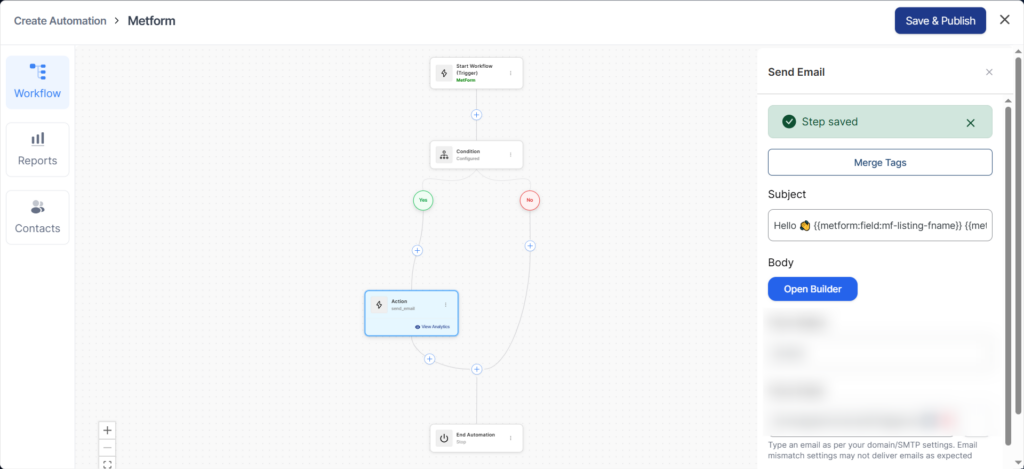
Merge Tags
Here are some common merge tags available for your form-based automations in QuillCRM Automations:
- Form ID—Pulls the Form ID
- Form Title—Gives the title of the form
- And other fields—you create from your form.
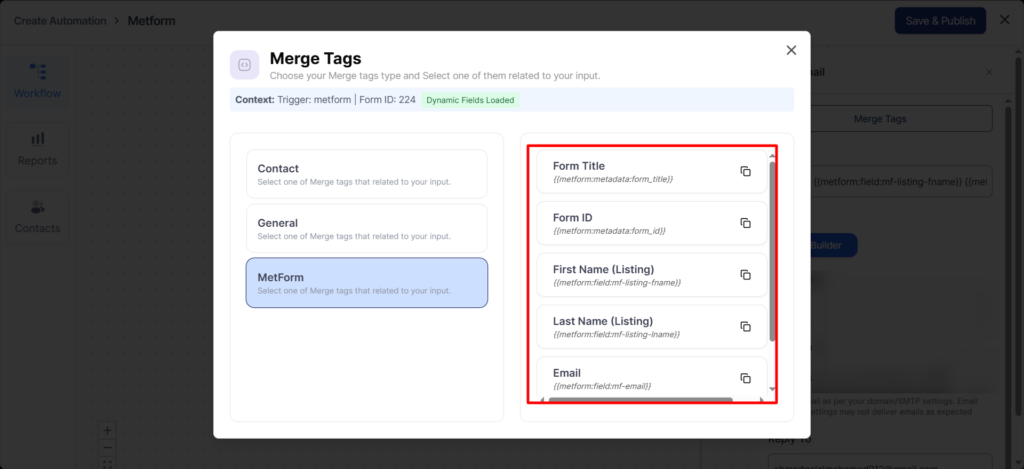
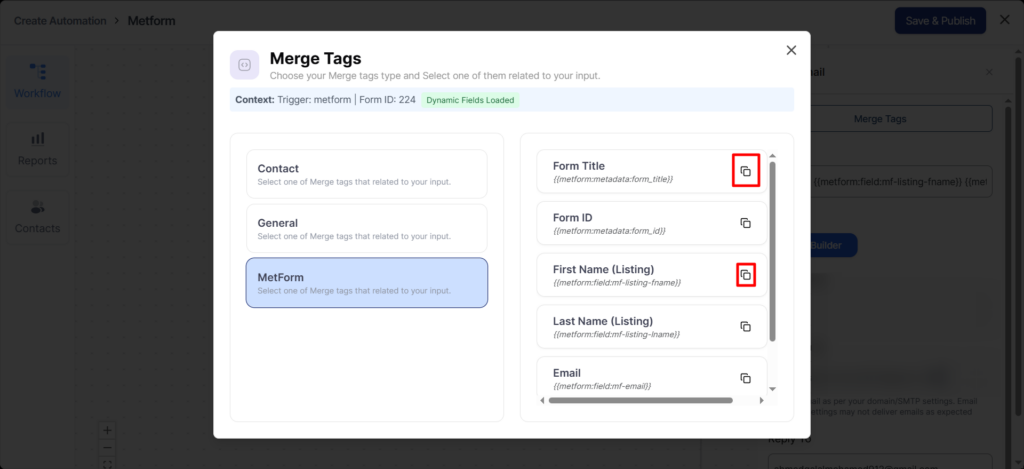
You can use these merge tags to fetch and post the dynamic data entered on forms.
To fetch any field of your form, click on the copy icon next to the form field merge tag.
After that, go to the MetForm Forms plugin and submit the Contact Form to trigger the automation.
Fill in all data.
Select the “Form Field (MetForm Forms)” rule under the IF section.
Then choose the field “Are you interested in trying out QuillCRM Automations?”
If the user selects “Sure, yes!”, an email will be sent.

Your automation is live and running.
Now when any user signs up to your form and selects one of the product categories, it’ll send the particular email you assigned to them.
Well done! You’ve successfully set up an automation using MetForm Forms in QuillCRM Automations.