


Step 1: Form Information
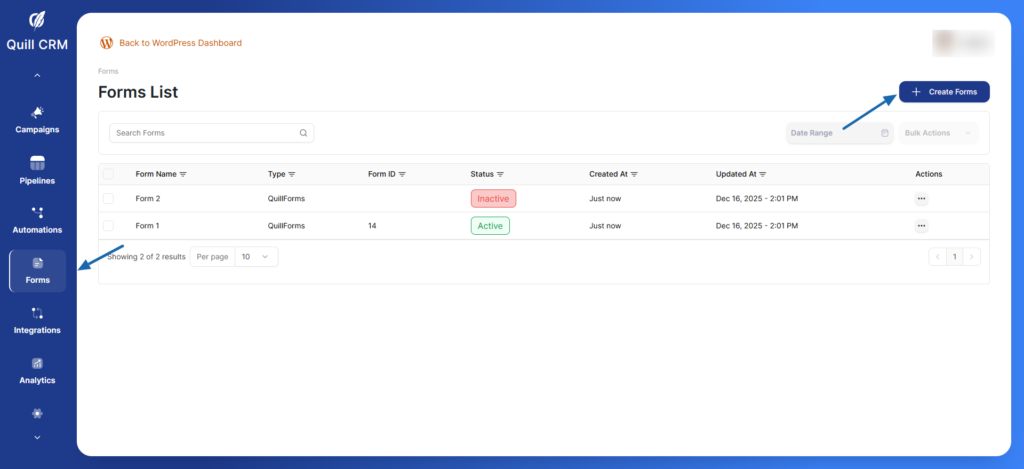
- Click the Create Forms button in the top right corner
- Enter your Form Name (e.g., “Newsletter Signup”, “Contact Form”)
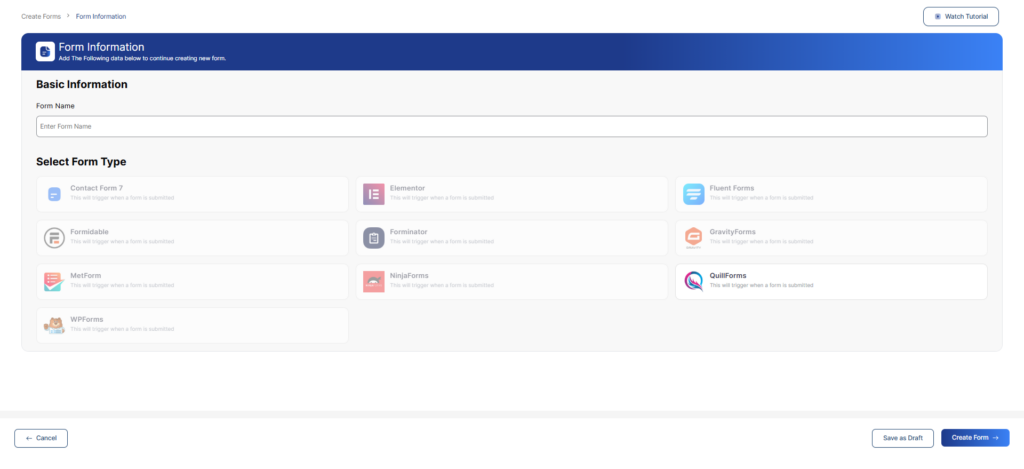
Step 2: Select Form Type
Choose from the available form builder integrations:
- Contact Form 7 – Popular WordPress contact form plugin
- Elementor – Visual page builder forms
- Fluent Forms – Advanced form builder with conditional logic
- Formidable – Powerful form creation tool
- Forminator – All-in-one form solution
- GravityForms – Professional-grade form builder
- MetForm – Elementor-based form builder
- NinjaForms – Flexible form creation plugin
- QuillForms – Conversational form builder (Recommended)
- WPForms – Beginner-friendly form builder
Select your preferred form type
Step 3: Select Form ID
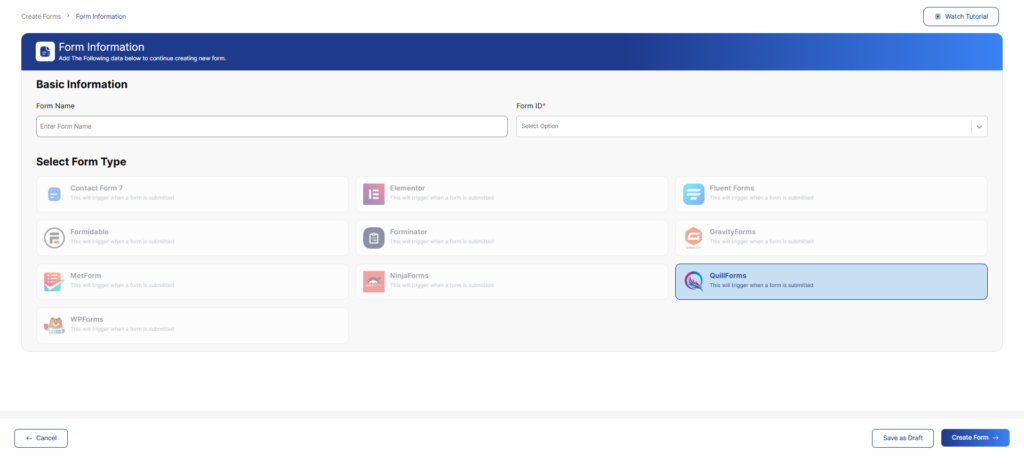
Then, click Create Form to proceed to the next step
Step 4: Mapping Fields
This is where you connect your form fields to Quill CRM contact fields.
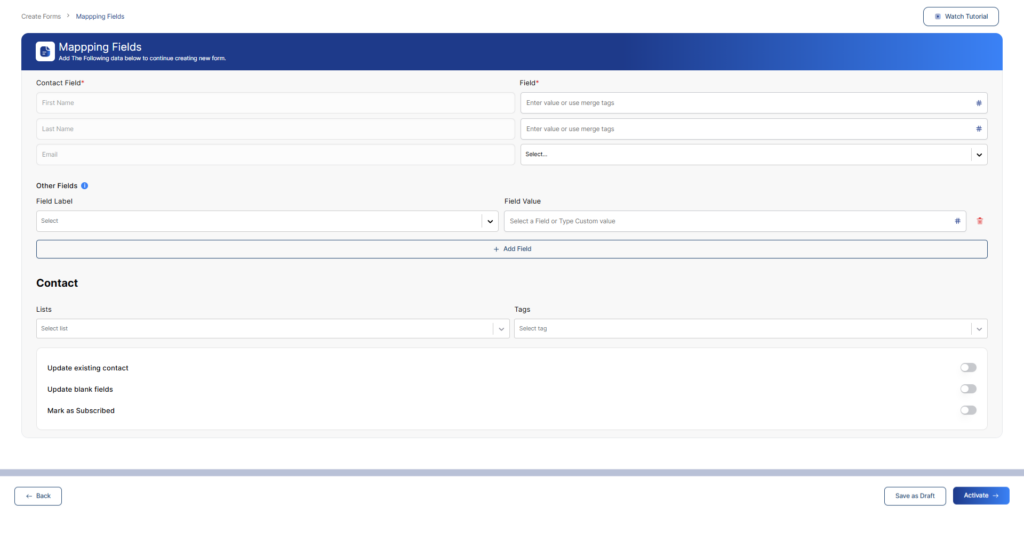
Contact Field Mapping
Map the following required fields:
- First Name – Maps to contact’s first name
- Last Name – Maps to contact’s last name
- Email – Maps to contact’s email address (required)
For each field, you can either:
- Enter a static value
- Use merge tags by clicking the # icon
- Select from dropdown options
Email Field Options
For the Email field, select the appropriate mapping from the dropdown:
- Email Address – Standard email field
Other Fields
You can add additional custom fields by:
- Click + Add Field button
- Select the Field Label from the dropdown
- Enter the Field Value or select a field/custom value
- Use the # icon for merge tags
- Click the trash icon to remove a field
Contact Settings
Configure how contacts are handled:
Lists
- Select which list(s) new contacts should be added to
- Choose from your existing contact lists
Tags
- Assign tags to contacts submitted through this form
- Helps with segmentation and automation
Update Options
Toggle these settings as needed:
- Update existing contact – Updates contact information if email already exists
- Update blank fields – Only fills in empty fields on existing contacts
- Mark as Subscribed – Automatically subscribes contacts to your email list
Step 5: Save Your Form
Once field mapping is complete:
- Click Save as Draft to save without activating
- Or click Activate to make the form live immediately