


The CSV import is the most flexible way to bring contacts into Quill CRM. You can import contacts from any spreadsheet, email service, or CRM by exporting them to a CSV file first and then uploading it to Quill CRM.
Preparing Your CSV File
Before importing, make sure your CSV file meets these requirements:
- The file must be in .csv format (comma-separated values).
- The first row must contain column headers (e.g., Email, First Name, Last Name, Phone).
- Each contact should be on its own row.
- The file must include an Email column — this is required for every import.
- Use UTF-8 encoding for proper character support.
Here is an example of a well-formatted CSV file:
Email,First Name,Last Name,Phone,City,Country
john@example.com,John,Smith,+1234567890,New York,US
jane@example.com,Jane,Doe,+0987654321,London,UK
Step 1: Open the Import Modal
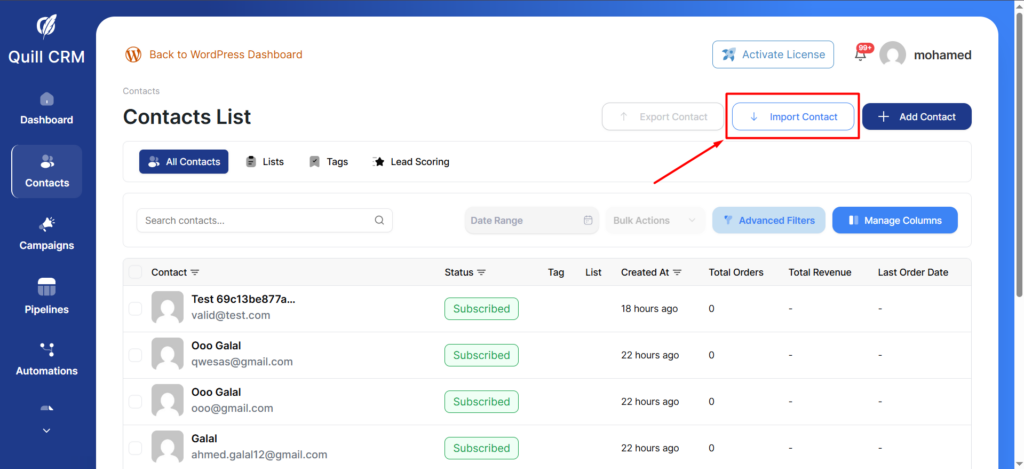
Navigate to Quill CRM → Contacts and click the “Import” button in the top toolbar. This opens the Import modal where you can select your import source.
From the source list, select “CSV”.
Step 2: Upload Your CSV File
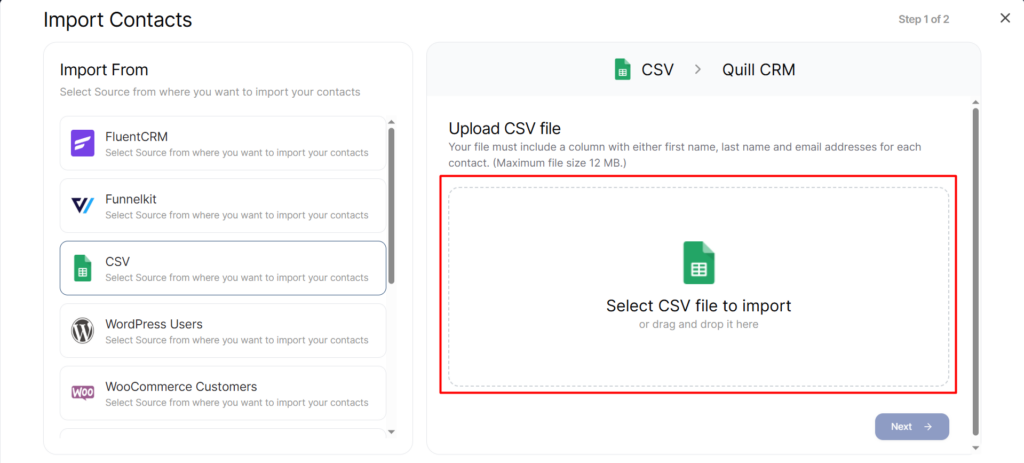
You’ll see a file upload area where you can:
- Drag and drop your CSV file onto the upload zone, or
- Click “Browse” to select the file from your computer.
After uploading, Quill CRM reads the headers from your file and prepares them for the field mapping step.
Step 3: Map Your Fields
This is the most important step. You need to tell Quill CRM which CSV columns correspond to which contact fields.
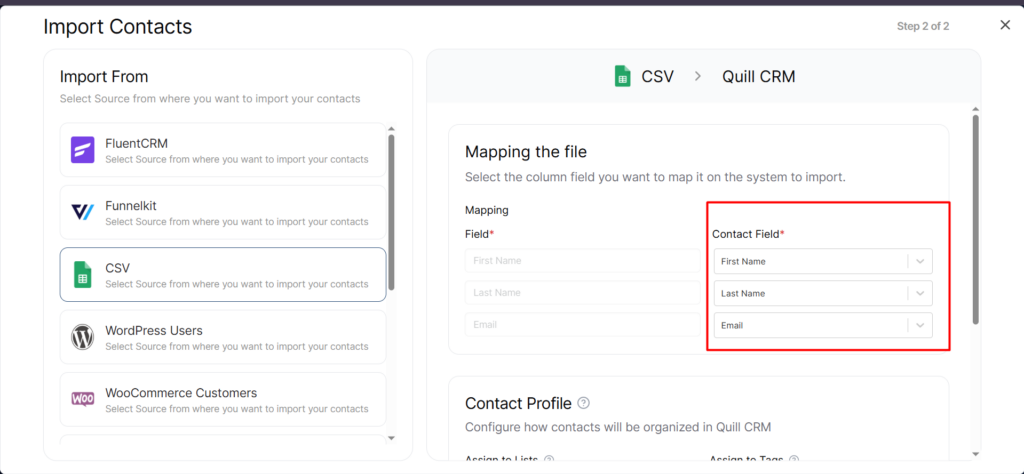
Contact Field Mapping
For each Quill CRM field, select the matching column from your CSV file using the dropdown menus:
| Quill CRM Field | Description | Required? |
|---|---|---|
| The contact’s email address | Yes (required) | |
| First Name | Contact’s first name | No |
| Last Name | Contact’s last name | No |
| Phone | Phone number | No |
| Address | Street address (Line 1 and Line 2) | No |
| City | City name | No |
| State | State or province | No |
| Country | Country name or code | No |
| Zip | Postal / ZIP code | No |
| WhatsApp Phone | WhatsApp number | No |
If you have Custom Fields configured in Quill CRM, they will also appear as additional mapping options grouped under their respective field groups.
Lists Mapping
If your CSV contains a column with list names, you can map those values to Quill CRM lists. For each source list name, you can either:
- Select an existing Quill CRM list to assign contacts to, or
- Enable “Auto-create” to automatically create new lists matching the source names.
Tags Mapping
Similarly, if your CSV has a tags column, you can map tag values to Quill CRM tags with the same options for selecting existing tags or auto-creating new ones.
Step 4: Set Contact Profile Options
Below the field mapping, you’ll find the Contact Profile section with these options:
- Assign to Lists: Select one or more lists to assign all imported contacts to.
- Assign Tags: Select one or more tags to apply to all imported contacts.
- Contact Status: Set the default email status for imported contacts (Subscribed, Unsubscribed, or Unverified).
- Send Double Opt-in Email: When enabled and status is “Unverified”, each new contact will receive a double opt-in confirmation email.
- Update Existing Contacts: When enabled, if a contact with the same email already exists, their information will be updated with the data from the CSV. When disabled, existing contacts are skipped.
Step 5: Run the Import
Click “Import” to start the process. Quill CRM processes contacts in batches of 20 at a time. You’ll see a progress indicator showing:
- Number of contacts created (new contacts added)
- Number of contacts updated (existing contacts modified)
- Number of contacts skipped (duplicates when “Update Existing” is off)
- Number of contacts failed (invalid email or other errors)
The import runs until all rows have been processed. Once complete, you’ll see a summary of the results.
After Import
- The CSV file is automatically deleted from the server after the import completes for security.
- All imported contacts appear in the Contacts list immediately.
- If you assigned lists or tags, those associations are applied right away.
Tips for a Successful CSV Import
- Clean your data first: Remove duplicates, fix formatting issues, and verify email addresses before importing.
- Start with a small test: Import a few rows first to verify your mapping is correct before importing thousands of contacts.
- Use “Update Existing” wisely: Only enable this if you intentionally want to overwrite existing contact data.
- Email field is mandatory: Any row without a valid email address will be marked as failed and skipped.