


This guide walks you through creating your first email sequence in Quill CRM. An email sequence lets you send a series of automated emails to contacts over time, each at a defined delay interval.
Step 1: Navigate to Email Sequences
From your WordPress admin dashboard, go to Quill CRM → Email Sequences. This opens the Email Sequences list page where you can see all your existing sequences.
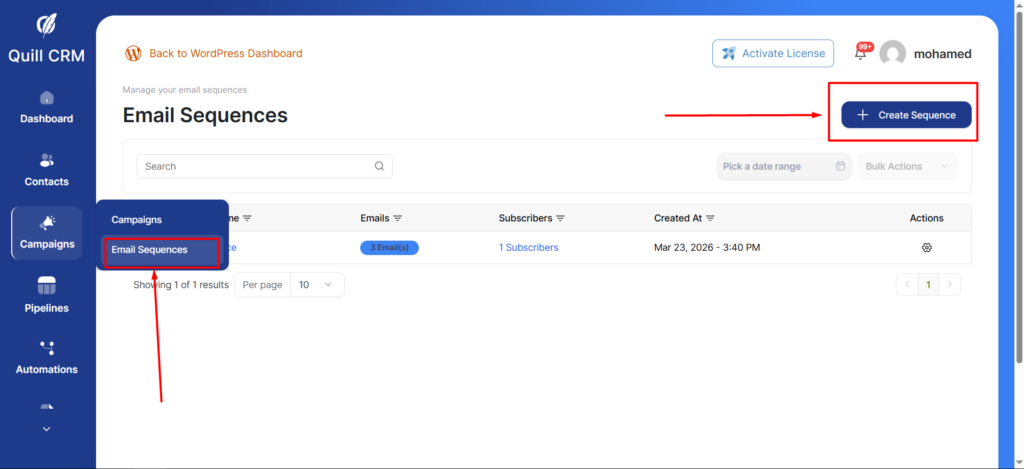
Step 2: Create a New Sequence
Click the “Add New Sequence” button in the top-right corner. A modal dialog will appear with the following fields:
- Sequence Name: Enter an internal name for your sequence (e.g., “Welcome Series”, “Onboarding Flow”, “Post-Purchase Follow-up”). This name is for your reference only and is not visible to contacts.
Optional: Custom Sender Details
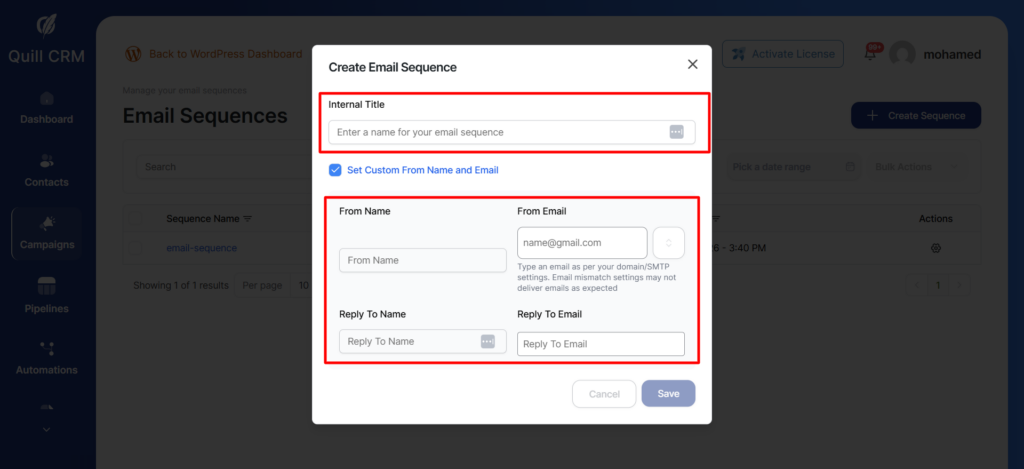
You can enable “Set Custom From Name and Email” to override the default sender settings for this specific sequence:
- From Name: The name that appears in the recipient’s inbox (e.g., “Sarah from Acme Corp”).
- From Email: The email address the sequence emails will be sent from.
- Reply-To Name: The name used when a recipient replies.
- Reply-To Email: The email address where replies will be directed.
Click “Create” to save your new sequence. You will be taken to the sequence detail page where you can add email steps.
Step 3: Understanding the Sequence Detail Page
After creating a sequence, you’ll see the sequence detail page which displays:
- Flow Chart View: A visual representation of your sequence steps, showing the order and delays between each email.
- Subscribers Count: The number of contacts currently enrolled in this sequence.
- Add Step Button: Allows you to add new email steps to the sequence.
Sequence Statuses
Email sequences can have the following statuses:
| Status | Description |
|---|---|
| Draft | The sequence is being built and is not yet active. No emails will be sent. |
| Active | The sequence is live and processing. Enrolled contacts will receive emails based on their enrollment time and step delays. |
| Paused | The sequence is temporarily halted. No new emails will be sent until it is reactivated. |
| Completed | All enrolled contacts have received all steps, and the sequence has finished processing. |
Managing Your Sequences
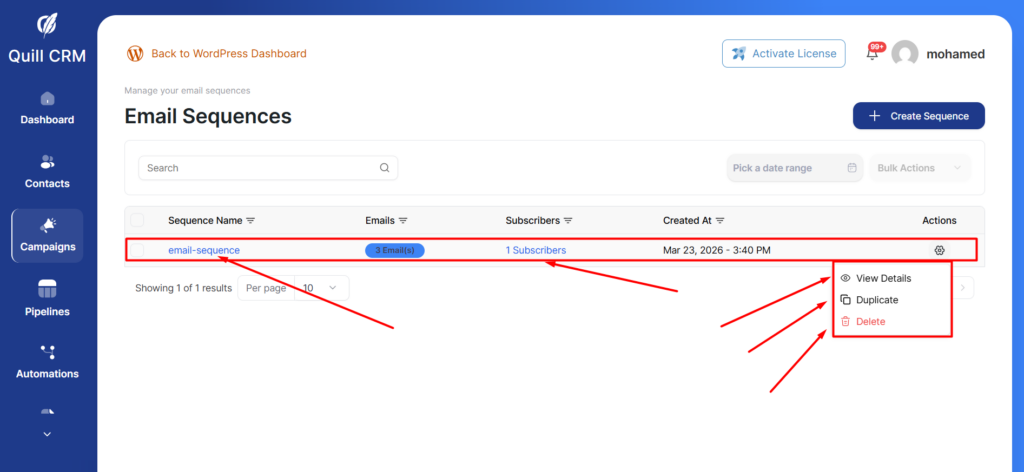
From the Email Sequences list page, you can:
- Edit a sequence by clicking on its name.
- Duplicate a sequence to create a copy with the same steps and settings.
- Delete one or more sequences using the bulk action or individual delete option.
- View Subscribers to see which contacts are enrolled and their enrollment status.
Important Notes
- A contact can only be enrolled in the same sequence once. If they are already enrolled, attempting to enroll them again will be skipped (unless forced via the API).
- Contacts must have a valid email address and an “subscribed” email status to be enrolled.
- Contacts are automatically removed from a sequence if they unsubscribe or their email bounces.
What’s Next?
Once you’ve created your sequence, the next step is to add email steps. See the Managing Sequence Steps guide for detailed instructions on adding and configuring individual steps in your sequence.