


Creating a Link Trigger
Step 1: Start Creation
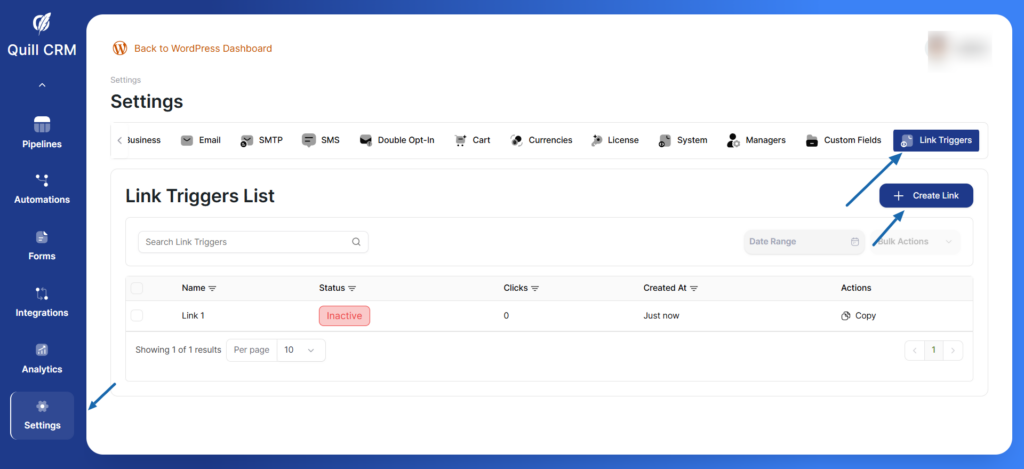
- From the Link Triggers List, click the Create Link button in the top right corner
- You’ll be taken to the Link Trigger Information page
Step 2: Basic Information
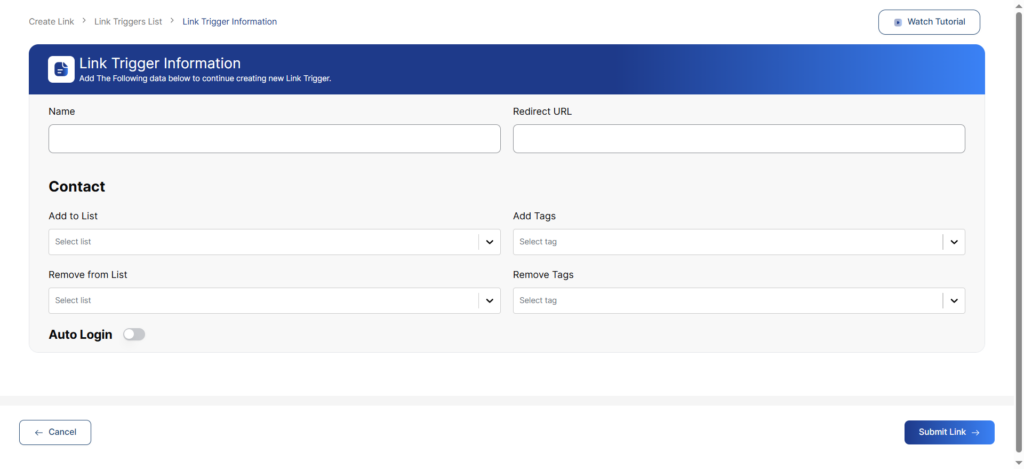
Name
Enter a descriptive name for your link trigger that helps you identify its purpose.
Examples:
- “Download eBook – Marketing Guide”
- “Webinar Registration – January 2024”
- “Product Interest – Premium Plan”
- “Email Click – Newsletter CTA”
Redirect URL
Enter the destination URL where contacts will be sent after clicking your link trigger.
Important:
- Include the full URL with
https://orhttp:// - Make sure the destination page is live and accessible
- Test the URL before activating the link trigger
Examples:
https://yourwebsite.com/thank-youhttps://yourwebsite.com/download/ebook.pdfhttps://yourwebsite.com/webinar-roomhttps://yourwebsite.com/product-page
Step 3: Contact Actions
Configure what happens when someone clicks your link trigger.
Add to List
Select one or more lists to automatically add contacts to when they click the link.
How to configure:
- Click the Add to List dropdown
- Select the list(s) you want to add contacts to
- You can select multiple lists
Add Tags
Select tags to automatically apply to contacts when they click the link.
How to configure:
- Click the Add Tags dropdown
- Select the tag(s) you want to apply
- You can select multiple tags
Remove from List
Select lists to automatically remove contacts from when they click the link.
How to configure:
- Click the Remove from List dropdown
- Select the list(s) you want to remove contacts from
- You can select multiple lists
Remove Tags
Select tags to automatically remove from contacts when they click the link.
How to configure:
- Click the Remove Tags dropdown
- Select the tag(s) you want to remove
- You can select multiple tags
Step 4: Auto Login
Enable the Auto Login toggle to create a secure one-click login link.
When enabled:
- Contacts are automatically logged into your website when they click the link
- No username or password required
- Secure, one-time use authentication
- Perfect for member areas, course access, or exclusive content
Use cases:
- Member area access links
- Course enrollment links
- Exclusive content access
- Password-less login for emails
Security note: Auto login links are tied to specific contacts and should not be shared publicly.
Step 5: Submit Your Link Trigger
- Review all settings to ensure they’re configured correctly
- Click Submit Link to create and activate your link trigger
- Or click Cancel to discard and return to the list