


In this section of the documentation, we’ll help you set up your first automation.
Step 1: Add a new automation
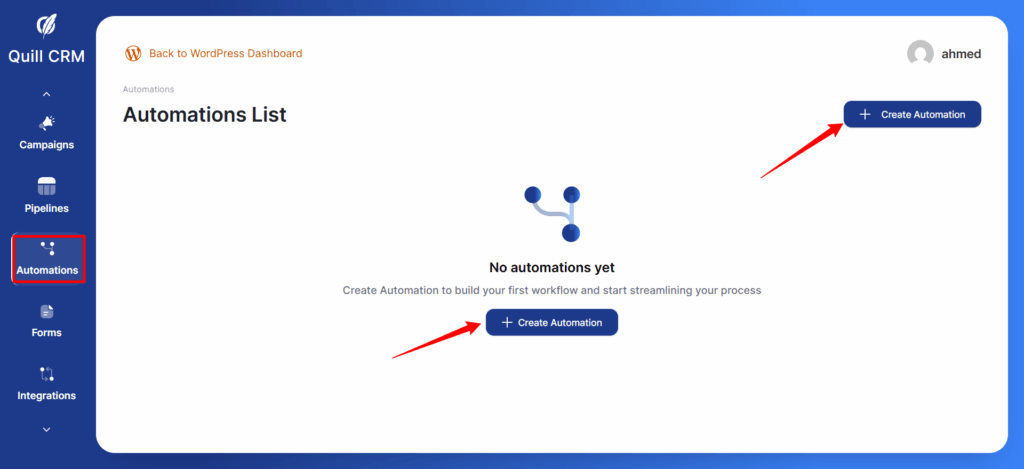
Go to Automations and click on Create Automation.
Click the Create Automation button, enter a name for your automation, and then select a trigger.
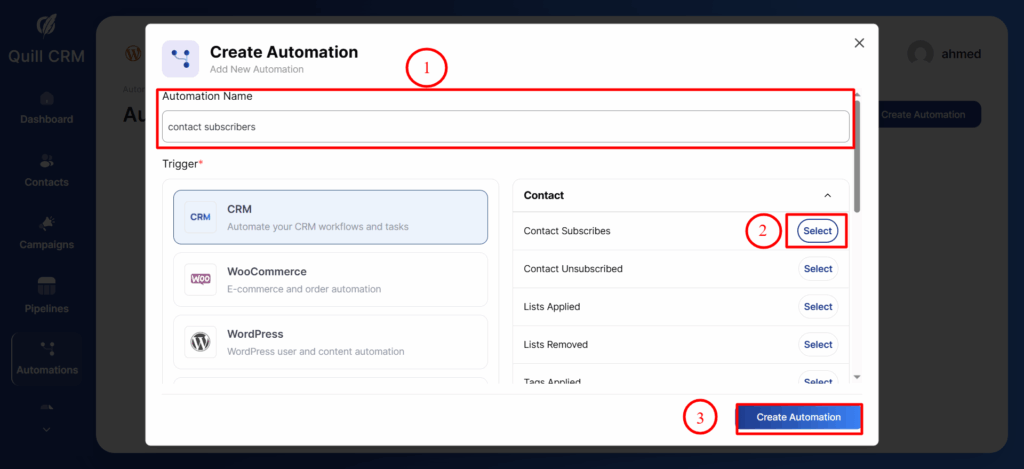
Then, click on the Create Automation button.
You will see the workflow along with the node for the trigger you selected earlier.
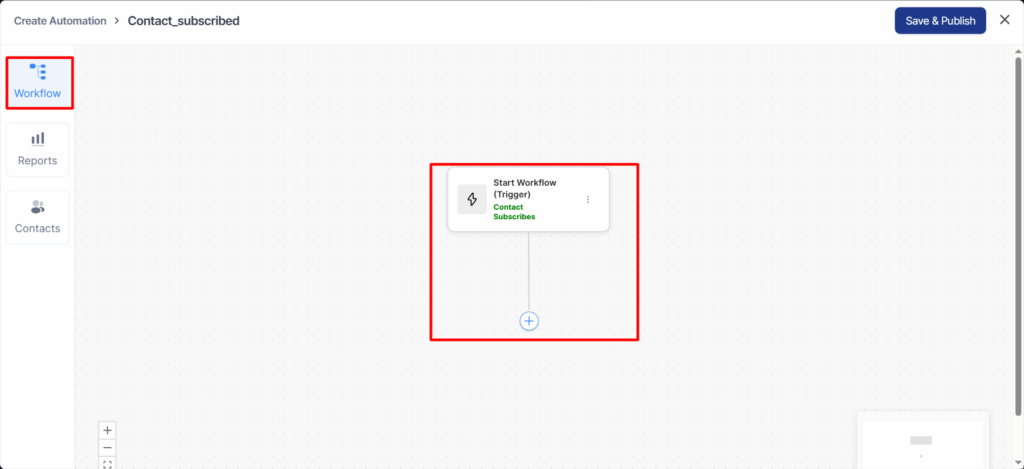
Step 2: Add the action by clicking on the + button
Clicking on the (+) icon will give you six nodes to choose from: Action, Delay, Condition, Goal, or End Automation.
- Action—Specify a direct action to be performed when the event gets triggered
- Delay—Set a specific delay for particular actions
- Condition—Add conditional actions under if-then-else statements to your workflow
- Goal—Specify an end objective of your automation
- End Automation—Directs to end the automation
Here, we will select the Action.

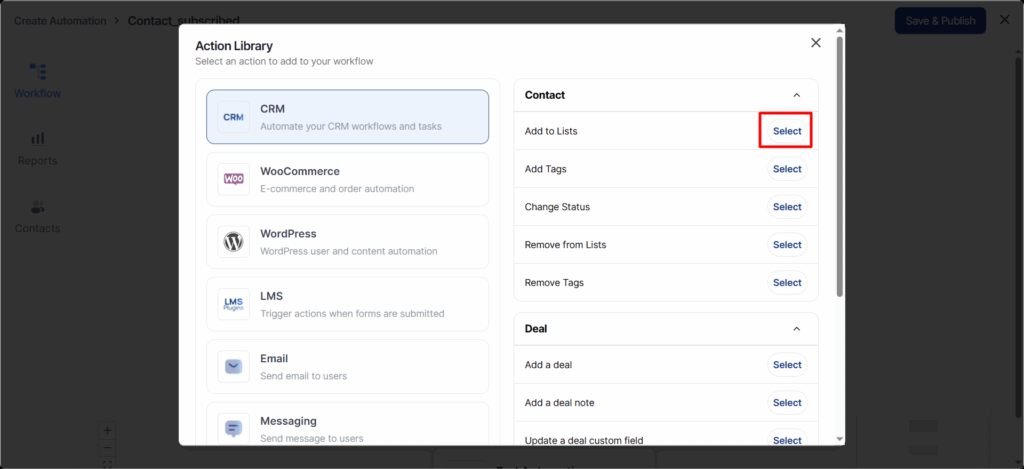
A pop-up window will appear where you have to assign an action.
Here we have selected “Add to Lists” as the action.
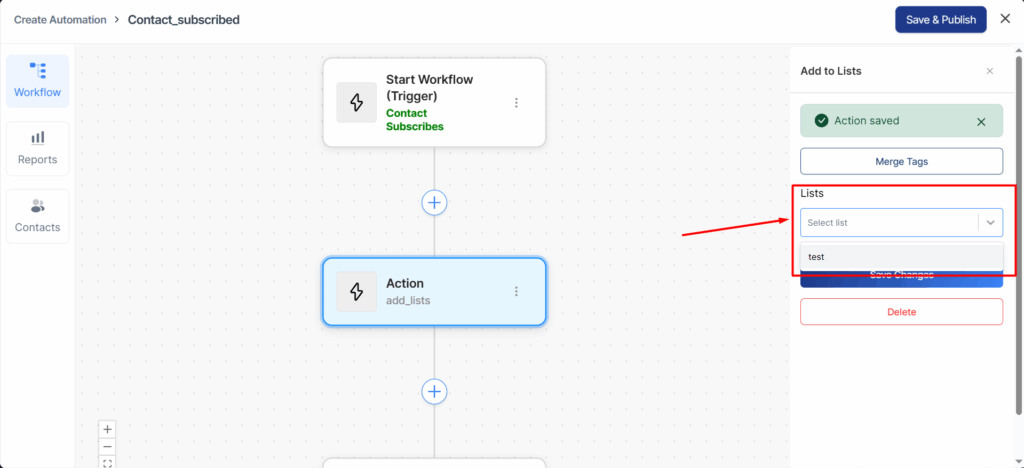
After selecting an action, the slider menu will open so you can configure the settings for that action.
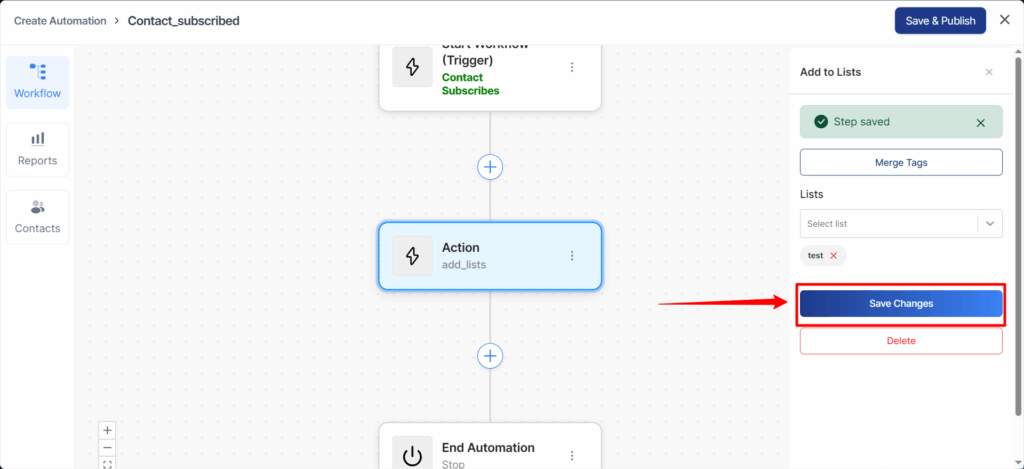
For the lists, select the ones you created earlier from the Lists tab under the Contacts section.
Then click on the Save Changes button.
If you want to add more actions, you can repeat the above steps and choose appropriate actions to make effective automation.
That’s it! You have now set up your first automation.